There was a question on the official forum on how one would be able to create recurring Change Requests (http://social.technet.microsoft.com/Forums/en-US/systemcenterservicemanager/thread/3f9f08ce-c331-43cf-b22c-2fe43da1440d/). So I figured that it might be a good idea to create a blog post on how to achive this.
In this blogpost, we are going to use the authoring tool to create a new custom workflow that runs a powershell script to create a new change request (with a template) on a pre-defined schedule.
To be able to do what’s decribed in this post, you will need to download and “install” the latest version of SmLets: http://smlets.codeplex.com/
Step 1 – Create a Change Request template
- Start your SCSM console and go to Library -> Templates.
- Click Create template in the task pane.
- Enter a name, description and choose to target the Change Request class. We’ll also have to decide where we want to save this template. I’ll chose to create a new MP to save the whole solution/blogpost within.
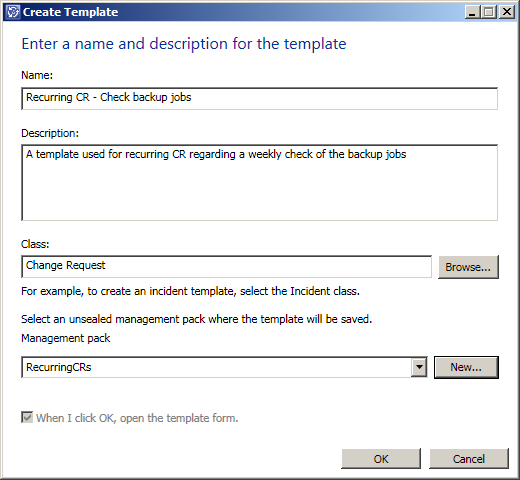
- When pressing Ok the template will be displayed in design mode. Enter the appropiate information and remember to add atleast one activity.
- Oki, so now when the template is finished, we need to export the MP in which it was stored. To do this, go to Administration -> Management Packs and locate the MP. Mark it and then click Export in the task pane.
Step 2 – Create the workflow
- Start the Authoring Tool and open the MP we just exported from SCSM and in which our template is stored.
- In the Management Pack Explorer, right click Workflows and select Create.
- Enter a good name and description.
- At the next page of the wizard, we’ll have to enter a workflow run condition. The defualt value “Run at scheduled time or at scheduled intervals” suits us perfectly.
- Enter on what days of the week and at what time you want the workflow to run. Then click your way through the rest of the wizard.
- An empty workflow should now be displayed in the authoring tool. Let’s add a script activity to this workflow, so something happens when it’s triggered. Do this by dragging the Windows Powershell Script activity from the Activities Toolbox to the workflow.
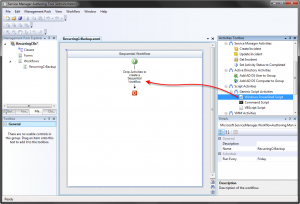
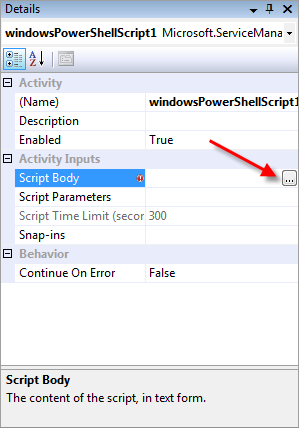
- Next we will have to define the properties of the Powershell activity. This is done by marking the activity and then locating the Script Body in the Details pane. When marking the Script Body, a “…” button will appear. Click that button.
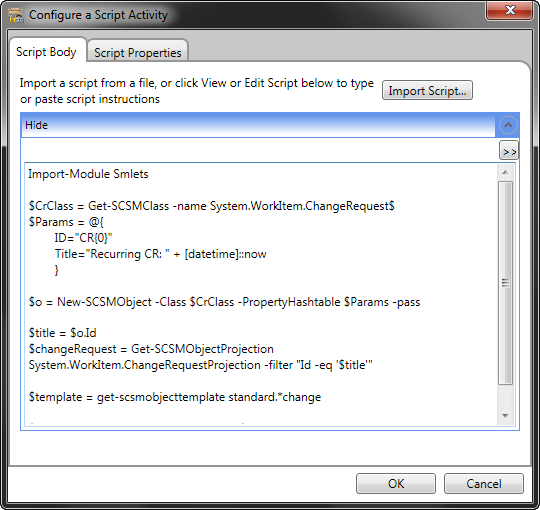
- A dialog box named Configure a Script Activity should appear and in that box there should be a line that says “View or Edit Script”. Click that line to show the field in which we can add our Powershell script.
- Copy this Powershell script and paste into the Script body of the activity.
- Before we press Ok, there is (atleast) one thing we need to edit first, and that is the $template. In step 1 we created a template that we wanted to use in this workflow, and to be able to use that, we need to find out the ID of that template. In order to do that, we need to open the MP/XML file in which it is stored.Locate your MP and open it with an XML editor (notepad should be fine). Now do a search for the name of your template, until you find a display string for it. In that display string, an ElementID should be defined. Copy that ID (without the ” ” characters).

- Now, replace the ‘standard.*change’ text in your powershell script with this ID, like this:
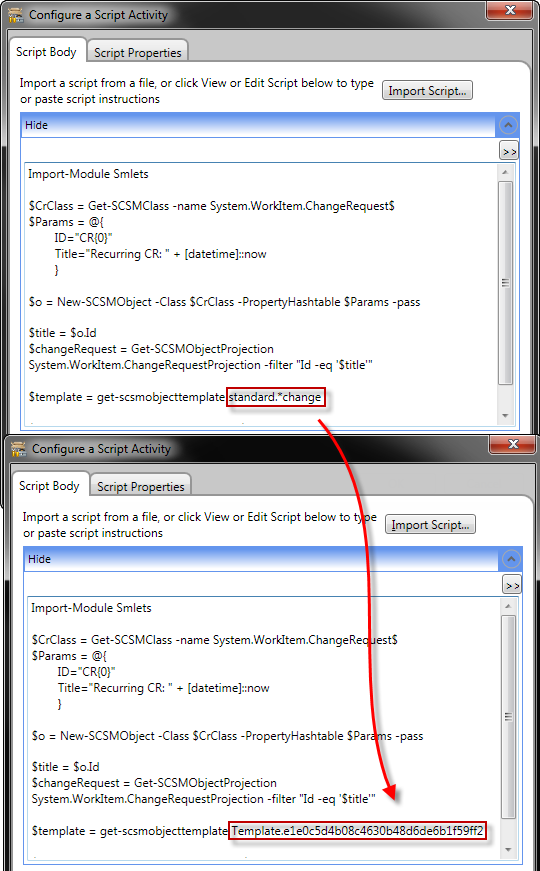
- Press Ok to close the dialog box and then hit the Save All button in the authoring tool.
- Along with our updated MP, the authoring tool should now have created a couple of files. One of them should be a DLL file which needs to be copied to the installation directory of SCSM (by default: C:\Program Files\Microsoft System Center\Service Manager 2010). After you’ve copied the DLL into place, open the SCSM console and import the MP (Administration -> Management Packs).
Import-Module Smlets

$CrClass = Get-SCSMClass -name System.WorkItem.ChangeRequest$
$Params = @{
ID="CR{0}"
Title="Recurring CR: " + [datetime]::now
}

$o = New-SCSMObject -Class $CrClass -PropertyHashtable $Params -pass

$title = $o.Id
$changeRequest = Get-SCSMObjectProjection System.WorkItem.ChangeRequestProjection -filter "Id -eq '$title'"

$template = get-scsmobjecttemplate standard.*change

$changeRequest.__base.ApplyTemplate($template)
$changeRequest.__base.Commit()
Like this:
Now a CR should be created every time your schedule starts the workflow!
Thanks to Jim Truher who helped me with the Powershell syntax for applying a template!

Pingback: create change requests using powershell and add it to workflow to run periodically | Emre Ates
Pingback: SCSM.SE » Blog Archive » Create Runbook activities from Orchestrator
Pingback: Create Runbook activities from Orchestrator