So in my previous post I described some of the new features and functions in Service Manager 2012 briefly. In this post I’ll try to describe how they all tie together. As in the last article, all the information and screenshots in this post is from the MMS session “Service Manager 2012 Overview”.
To start with, I would like to describe how the System Center Orchestrator (Opalis) connector can be used.
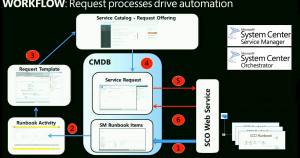
SCO connector
- The Service Manager connector will connect to the Orchestrator Web Service to import runbooks into Service Manager.
- From these runbooks, an Service Manager administrator can use a console task to create a new custom Activity using the input parameters from the runbook and automatically map these to properties of this new Activity. Without authoring or coding in the authoring tool!
(Example: You have a runbook that requires the input parameters DiskType and DiskSize. When clicking the console task from this runbook in Service Manager a new custom activity will be created. This activity will have two new, additional properties named DiskType and DiskSize.)
- The administrator can now create a Work Item template (CR, SR or RR) which include this new custom activity and present that as a Request Offering on the Self-service Portal.
- Now, if an end-user goes to the Self-service portal and creates a Service Request of this type, the custom activity of this work item will get the status In Progress, which will …
- … invoke the runbook in Orchestrator by utilizing the Web Service of Orchestrator. The runbook would now start and a workflow …
- … within Service Manager could monitor this workflow by using the same web service. When the workflow discovers that the runbook has finished, we could trigger some actions inside Service Manager. (Such as completing the activity/work item).
With this information in mind, let’s move on to a real example. In this example we will take a look at an automated Self-service Request where our end-user is requesting a new virtual machine.
Self-service Portal
SSP - Picture 1
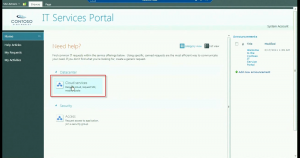
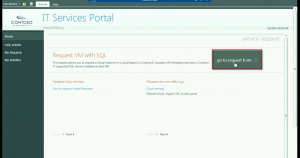
In this first picture, we can see the first page of the Self-service Portal. This is where all your Service Offerings will be presented. All these Service Offerings is created from the Service Manager console by an administrator, and no web-coding is required to make them appear on the Self-service Portal.
SSP - Picture 2
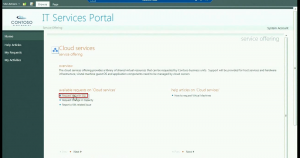
When clicking a certain Service Offering, we will get to the main page of that Service Offering. Here will all the Service Requests and Knowledge Articles related to this Service Offering be presented. Again, no coding required.
SSP - Picture 3
This third picture simply displays more information regarding the certain Service Request that was clicked.
SSP - Picture 4
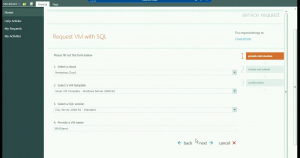
And finally, here is the realted form for this Service Request. This form is dynamically created from the information stored within the Service Request itself. See more details below.
Let’s take a look at all of this from the Service Manager console. To start with, let’s take a look at the Service Offerings.
Service Offerings
Service Offering View
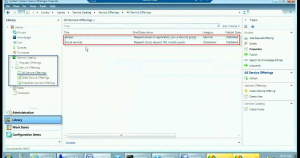
Here you can see that a Service Catalog item has been added under Library. In this particular screenshot the “All Service Offerings” view is loaded, and you can see that we only have two Service Offerings for the moment; “Access” and “Cloud services”. Also note that both of these has the status published, which makes them appear in the Self-service Portal. If you take a look at the first picture of the Self-service Portal set above, you can see that this is exactly what your users will see.
Service Offering, General
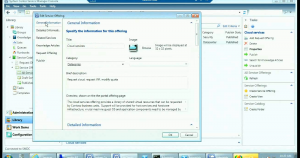
Above you can see the General settings of the Service Offering named “Cloud Services”. All the information on this tab used on the Sef-service Portal and can be seen in the previous screenshots. (Except for the Image, but that is a bug in the build that was used to demo during the session).
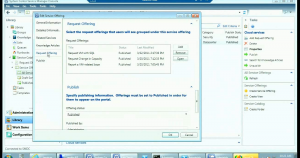
Service Offering, Request Offering
The last picture displays the Request Offerings related to this particular Service Offering. And this leads us to:
Request Offerings
So a Request Offering is a request bound to one or more Service Offerings. Just like the Service Offerings dialog above, the Request Offerings have several fields for information that will be displayed on the Self-service Portal, but whats unique with the Request Offering, is this.
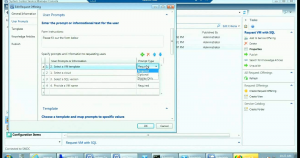
Request Offering User Prompts
In this part of the Request Offering dialog, you will be able to enter questions that will be displayed when clicking the corresponding Request Offering in the Self-service Portal (in this case, we are looking at the “Request VM with SQL” Request Offering). You can also define whether these questions is Required, Optional or Informational. Again, take a look at the screenshots of this Request Offering earlier in this post, and you will understand how it all works together.
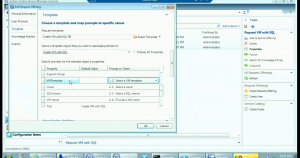
Request Offering Mapping
Here we can see how each question is mapped to a property of the selected template. This information together with the User Prompts is what will create the dynamic form seen in the Self-service Portal. If we are storing a question in an enum property, that will show up as a list picker in the Self-service Portal, only allowing users to pick answers from that particular enum-list.
Service Request
Allright, let’s go back to that particular Service Request that we did at the Self-service Portal and take a look at that inside the console.
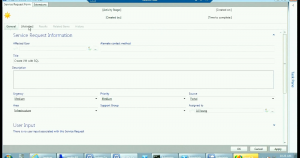
Service Request
Here we can see some basic information around the Service Request. We could (and should) have stored more information in the template and/or created more mappings in the Request Offering to be more detailed.
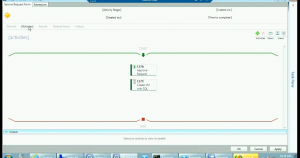
Service Request Activities
Here’s the activities related to this Service Request. As you can see there is two activities assigned to this Service Request; one Review Activity that is used for notification and to request an approval, and one Runbook Activity that will invoke an Orchestrator runbook.
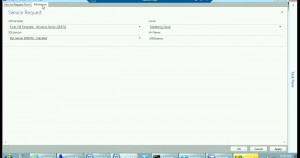
Service Request Extensions
On the extension tab we can see that the answers that was provided to the Request Offering on the Self-service Portal is stored.
Runbook Activity and Orchestrator Connector
So a Runbook Activity, is based upon a Runbook brought over to Service Manager by the Orchestrator Connector. As I described first in this post, you can create custom activities based upon these runbooks.
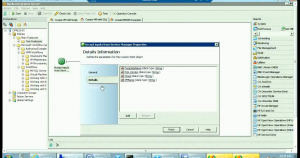
Orchestrator Runbook
Here’s what the runbook looks like in Orchestrator. The dialog that’s opened displays the input parameters required for the runbook to beeing able to start.
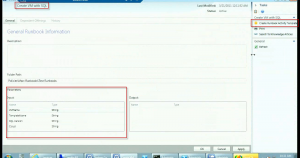
Runbook
This is how it looks like inside Service Manager. Also note the task named “Create Runbook Activity Template”. When clicking that task, a new Runbook Activity is created. Basicly, the thing that differs this activity from other activities…
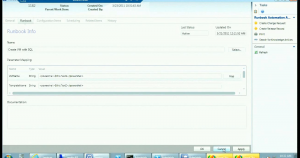
Runbook Activity
… is the Runbook tab. This is where the mappings between Service Manager and Orchestrator is defined.
Service Request – again
Let’s go back to that Service Request again. As you remember, we had an Review activity in our Service Request that needed to be approved before the Runbook Activity would start. So let’s say we did that approval and the Runbook Activity went into “In Progress”. What would happend then, is that Service Manager would invoke the runbook inside Orchestrator, using the Orchestrator web service and the parameters/properties from our activity.
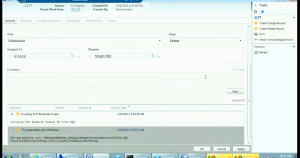
Service Request Log
When this has happend, our Service Request would get updated with two comments in the Action Log. One that’s telling us that the runbook was invoked, and another one telling us with what parameters.
This runbook would now run inside Orchestrator and when it’s done, it would update the status of the activity to completed; which would trigger an internal workflow inside Service Manager that would set the status of the Service Request itself to completed aswell.
Summary
Allright. I hope you did get some better understanding on how all these new functions and features will work in Service Manager 2012. I’m very thrilled about the new Self-service Portal and how we can integrate with Orchestrator to automate as much work as possible. The possibility to create Service Offerings in a Service Catalog from the Service Manager console and present all this on a Self-service Portal that doesn’t require any coding at all is a Wonderful feature that I know everyone will appreciate. I find it safe to say that if the Self-service Portal is as good as it looks at the moment, it will be deployed and used in every Service Manager 2012 installation.
Please comment if anything is unclear or if you have some questions.


