Archive for: ‘June 2011’

Minor SSP modifications, part 4 – Changing status of an incident when updated by the End user

June 12, 2011 Posted by Anders Asp

Part 1 – Preperations: http://www.scsm.se/?p=398
Part 2 – Changing the default urgency of an incident: http://www.scsm.se/?p=421
Part 3 – Changing the preferred contact information behaviour: http://www.scsm.se/?p=459

Disclaimer: I’m not a developer and this is all new to me as well. All code is provided “as is” and I do not give any warranties or take any responsible for any errors that might occur.

One of the new features that the “new” portal provided, was the ability to let end users updated their incidents. That is a really nice feature but wouldn’t it be good to notify the assigned analyst that the end user has updated the incident? To achieve that, we are going to modify the SSP so that when an end user updates his or hers incident, we are changing the status of the incident to “Updated by Affected user”. In that way we could create a regular workflow inside Service Manager to notify the assigned analyst.

  1. To start with, open the Service Manager console and go to Library –> Lists. Locate the Incident Status list and open it.
  2. Mark Active and press Add child. Give the new list item a name, such as “Updated by Affected user”, then press Ok.
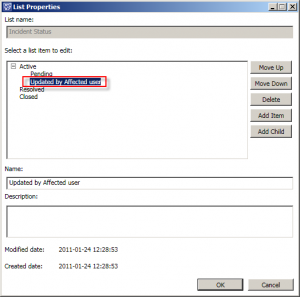
  3. Now we need to find out the enumeration value for this list item. To do so, we’re going to export the Management Pack in which it is stored. Go to Administration –> Management Packs and locate the “Service Manager Incident Management Configuration Library” management pack. Export this management pack.
  4. Open the “Service Manager Incident Management Configuration Library” which you just exported and search for whatever you named your new status. In my case “Updated by Affected user”. This should take you to the bottom of the file, to the language section and to something that looks like this:
            <DisplayString ElementID="Enum.b0a54eb92f6a4ee7a2016e3fc154b204">
              <Name>Updated by Affected user</Name>
            </DisplayString>
    

    Copy the ElementID (Enum.b0a54eb92f6a4ee7a2016e3fc154b204), we are going to use it in an SQL query soon.

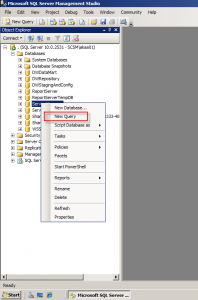
  5. Go the SQL server where the Service Manager database is stored, open the SQL Server Management Studio, locate the Service Manager database, right click it and select New Query.Run this query, and be sure to replace <ENUM> with the enumeration value we copied in step 4 (in my case “Enum.b0a54eb92f6a4ee7a2016e3fc154b204”).
    SELECT EnumTypeId, EnumTypeName
    FROM dbo.EnumType
    WHERE EnumTypeName = '<ENUM>'
    

    One line should be returned when running the query. Copy the EnumTypeId that is returned (in my case 401F45DE-1745-5AFB-9767-F412FB48835E).

  6. Start Visual Studio and load your SSP project.
  7. Locate and open the Webparts/Request/RequestDetails.cs and search for “Update Request”. Our fourth search should bring you to line 652 and to the code that looks like this:
    // Update request button
    HtmlTableCell r1c1 = Utils.GetTableCell(Constants.grayText, null, 30);
    this.updateRequestButton = new Button();
    this.updateRequestButton.ID = WebpartsConstants.UpdateIncidentButtonId;
    this.updateRequestButton.CommandName = "updateIncident";
    this.updateRequestButton.CommandArgument = "updateIncident";
    this.updateRequestButton.Command += new CommandEventHandler(updateRequestButton_Command);
    this.updateRequestButton.Text = WebPartsResources.UpdateRequestButton;
    this.updateRequestButton.Width = Unit.Pixel(135);
    r1c1.Controls.Add(this.updateRequestButton);
    

    This is where the Update Request button is added to the page. Line 7 (line 568 in VS) is the one that we are interested in, cause that is what is happening when someone presses the button. Click on updateRequestButton_Command to place your marker there, then press F12 to bring you to the definition of updateRequestButton_Command.

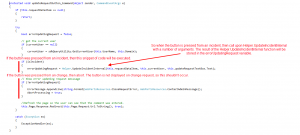
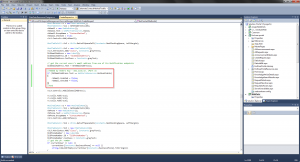
  8. This will take you to line 997 in VS and to the code that looks like this (please read the comments in the picture):So click on UpdateIncidentInternal to place your marker then, then press F12 to go to the definition.
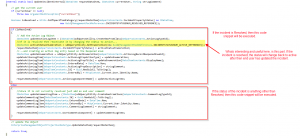
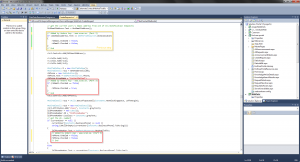
  9. This will bring you to the Helper.cs file and to the code that looks like this (please read the comments in the picture):So the first step is pretty easy. We would just have to replace the ManagementPackReferences.INCIDENTSTATUSENUM_ACTIVE_REFERENCE) with the GUID we got from the SQL query we ran in Step 5. I chosed to do it a little fancier though:
    if (isResolved)
    {
        // Add the Action Log Object
        IDataItem updateActionLogItem = (IDataItem)sdkQueryUtility.CreateEmoFromClass(WebpartsConstants.ActionLogTypeId);
        //If it is resolved then reactivate it by changing the status to Active...
    
        // Edited by Anders Asp - www.scsm.se. (Part 4)
        //IDataItem activeStatusEnumeration = sdkQueryUtility.GetEnumeration(new Guid(ManagementPackReferences.INCIDENTSTATUSENUM_ACTIVE_REFERENCE));
        IDataItem customStatusEnumeration = sdkQueryUtility.GetEnumeration(new Guid("401F45DE-1745-5AFB-9767-F412FB48835E"));
                   
        //requestDataItem[WebpartsConstants.IncidentPropertyStatus] = activeStatusEnumeration;
        requestDataItem[WebpartsConstants.IncidentPropertyStatus] = customStatusEnumeration;
        //End
    
        //...and creating an action log entry based on the Reopened enum
        IDataItem updateEnumeration = sdkQueryUtility.GetEnumeration(WebpartsConstants.ActionLogRecordReopenedEnumId);
        updateActionLogItem[WebpartsConstants.ActionLogPropActionType] = updateEnumeration;
        updateActionLogItem[WebpartsConstants.ActionLogPropTitle] = updateEnumeration[DataItemConstants.DisplayName];
        updateActionLogItem[WebpartsConstants.EnteredDate] = DateTime.Now;
        updateActionLogItem[WebpartsConstants.ActionLogPropDescription] = strLogComment;
        updateActionLogItem[DataItemConstants.Id] = Guid.NewGuid().ToString();
        updateActionLogItem[WebpartsConstants.EnteredBy] = HttpContext.Current.User.Identity.Name;
    
        requestDataItem[WebpartsConstants.ActionLogComponentName] = updateActionLogItem;
    }
    

    If we would build and deploy this to the SSP now, all resolved incidents that our end users comments, would get the status “Updated by Affected user”. But we want to make this happen on all types of incidents, regarding their previous status.

  10. To do this, we will have to add the two lines of code from above, to the second part of the if statement. Like this:
    //Since it is not currently resolved just add an end user comment
    IDataItem updateCommentLogItem = (IDataItem)sdkQueryUtility.CreateEmoFromClass(WebpartsConstants.CommentLogTypeId);
    updateCommentLogItem[DataItemConstants.Id] = Guid.NewGuid().ToString();
    updateCommentLogItem[WebpartsConstants.EnteredDate] = DateTime.Now;
    updateCommentLogItem[WebpartsConstants.EnteredBy] = HttpContext.Current.User.Identity.Name;
    updateCommentLogItem[WebpartsConstants.CommentLogComment] = strLogComment;
    // Added by Anders Asp - www.scsm.se. (Part 4)
    IDataItem customStatusEnumeration = sdkQueryUtility.GetEnumeration(new Guid("401F45DE-1745-5AFB-9767-F412FB48835E"));
    requestDataItem[WebpartsConstants.IncidentPropertyStatus] = customStatusEnumeration;
    // End
    

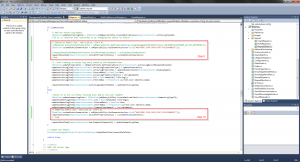
    And here’s a picture how it looks in Visual Studio:

  11. And with that change, we are all done. Build and copy the modified DLL files to the SSP server. As soon as someone updates an incident from the Self-service Portal, the status of that incident will change to “Updated by Affected user”.

If you would like assigned analyst to get notified when the end user has updated an incident, you should be able to do so with a regular workflow within Service Manager. Just use the critera
Incident status changed from NOT EQUAL “Updated by Affected user”
Incident status changed to EQUAL “Updated by Affected user”

You should also consider applying a template that changes the incident status back to Active when this workflow is triggered, otherwise you might miss notifications if an end user does comment the incident several times.
Minor SSP modifications, part 3 – Changing the preferred contact information behaviour

June 9, 2011 Posted by Anders Asp

Part 1 – Preperations: http://www.scsm.se/?p=398
Part 2 – Changing the default urgency of an incident: http://www.scsm.se/?p=421

Disclaimer: I’m not a developer and this is all new to me as well. All code is provided “as is” and I do not give any warranties or take any responsible for any errors that might occur.

 –

It’s almost exactly a month since my last post, and the reason for that is that I once again became a father of a little girl 🙂

But let’s put that aside for a moment, and let’s go on customizing the Self-service Portal.

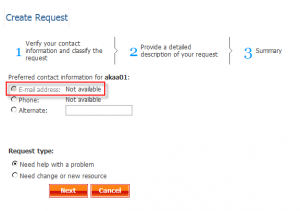
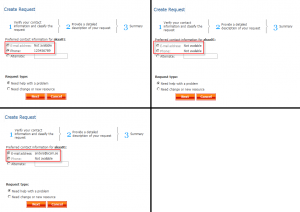
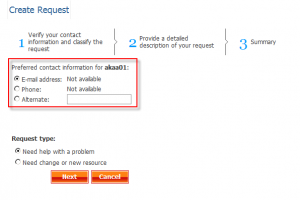
Today we’re going to focus on the behaviour of the “Preferred contact information” step when creating a new Incident or Change Request. By default, it looks like this:

And as you can see, even though Service Manager doesn’t have any information stored regarding my e-mail address or phone number, I can still chose to be contacted that way. The worst part is that even though the information is unavailable, it is still selected by default. We don’t want any end-user to register a new IR/CR if we don’t have any means in contacting them.

We are going to change the behaviour of this control, so if the information regarding the end-users e-mail address or phone number is unavailable, we will disable that radio button.

  1. Fire up Visual Studio and load your project.
  2. Open the CreateRequest.cs file that is located in WebParts/Request. This is the file in which almost all logic regarding the create request wizard is stored.
  3. So how are we going to find the correct lines of code to edit in this huge file? Let’s try searching for “contact” and see if we can find anything interesting…

    Our first hit should be the definition of a TextBox named alternateContactMethod. Doesn’t that sounds familiar? 🙂

    private TextBox alternateContactMethodTextBox;

    So let’s search again, but this time search for “alternateContactMethodTextBox”. This search will take you to a snippet of code that looks like this:

    HtmlTableCell r3c3 = new HtmlTableCell();
    r3c3.Attributes.Add("class", Constants.grayText);
    alternateContactMethodTextBox = new TextBox();
    alternateContactMethodTextBox.ID = "txtBoxAlternate";
    alternateContactMethodTextBox.CssClass = Constants.grayText;
    r3c3.Controls.Add(alternateContactMethodTextBox);

    And this is where the Alternate contact method textbox is added to the page. If you scroll a bit upwards, you should see a couple of comments saying something about Getting phone and Getting e-mail address. Great! We’ve found the place in the code where the preferred contact information is defined. (Line 1472 in Visual studio)

  4. So let’s take a look at the e-mail part:
    HtmlTableRow r1 = new HtmlTableRow();
    HtmlTableCell r1c1 = GetHeaderCell(20);
    rbEmail = new RadioButton();
    rbEmail.Text = WebPartsResources.Email;
    rbEmail.GroupName = "ContactMethod";
    rbEmail.Checked = true;
    r1c1.Controls.Add(rbEmail);
    
    HtmlTableCell r1c2 = Utils.GetLeftSpaceCell(Constants.NonBlockingSpace, LeftMargin);
    
    HtmlTableCell r1c3 = new HtmlTableCell();
    r1c3.Attributes.Add("class", Constants.grayText);
    lblEmailAddress = new Label();
    lblEmailAddress.ID = "lblEmailAddress";
    lblEmailAddress.CssClass = Constants.grayText;
    
    // get the current users's email address from one of its Notification endpoints
    lblEmailAddress.Text = GetEmailAddress();
    
    r1c3.Controls.Add(lblEmailAddress);
    

    Let’s take a closer look at some lines of the code:
    Line 3-6 is the definition of the radiobutton for the e-mail contact method. On line 6 this method is defined as checked = true, which means that this is the default value.
    Line 7 is the line of code that adds this control to the page itself.
    Line 13-15 is the lines of code where the label for the e-mail address is defined.
    Line 18. The text of the label itself is retrived from a function called GetEmailAddress.
    Line 20. The label is added to the page.With this knowledge, we are able to figure out that if the function GetEmailAddress on line 18 is returning “Not available” we should change the properties of rbEmail which is the radio button.

  5. Time to do some coding 🙂

    We need to add an if statement to check the value of lblEmailAddress, and if that value equals “Not available” we want to disable the radio button. Enter the following code on line 1504 in Visual Studio:

    if (lblEmailAddress.Text == WebPartsResources.NotAvailable)
    {
        rbEmail.Enabled = false;
        rbEmail.Checked = false;
    }
    

    So if we would build this and deploy it to the SSP, it would now look like this:That’s a great start, isn’t it? 🙂

    Just a couple of notes regarding the code we added before continuing:
    Instead of comparing lblEmailAddress.Text to the string “Not available”, I chosed to compare it to WebPartsResources.NotAvailable. The reason for that is if we are running the portal in a different language, or if someone decides that we want to use another verbiage instead, our code wouldn’t work. If we use WebPartsResources.NotAvailable we don’t have to worry for those things.

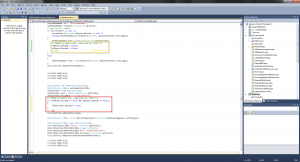
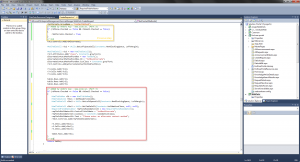
    Here’s how it looks in Visual Studio:

  6. Let’s go on and do the same with phone. First add this code to line 1523 in Visual Studio:
    if (rbEmail.Checked == false)
    {
        rbPhone.Checked = true;
    }
    

    This code will check the radio button for Phone if we unchecked rbEmail.

    Then go to line 1545 and add this code:

    rbPhone.Enabled = false;
    rbPhone.Checked = false;
    

    This is how it should look in Visual Studio now:
    If we would build and deploy this to the SSP, it would now look like this:Go to line 1566 and add this code:

    if (rbPhone.Checked == false && rbEmail.Checked == false)
    {
        rbAlternate.Checked = true;
    }
    

    This is the code that will set the Alternate radio button to checked, if the other radio buttons is unchecked.

    
  7. As a final step we want to make sure that if our end-users doesn’t have an available e-mail address or phone number, they are forced to enter something in the alternate contact method textbox. To do so, enter the following code on line 1591:
    if (rbPhone.Checked == false && rbEmail.Checked == false)
    {
        HtmlTableRow r3b = new HtmlTableRow();
        HtmlTableCell r3bc1 = GetHeaderCell(20);
        HtmlTableCell r3bc2 = Utils.GetLeftSpaceCell(Constants.NonBlockingSpace, LeftMargin);
    
        HtmlTableCell r3bc3 = Utils.GetTableCell(Constants.ValidationClass, null, null);
        RequiredFieldValidator reqFieldValidatorAlt = new RequiredFieldValidator();
        reqFieldValidatorAlt.ControlToValidate = "txtBoxAlternate";
        reqFieldValidatorAlt.CssClass = Constants.ValidationClass;
        reqFieldValidatorAlt.Text = "Please enter an alternate contact method";
        r3bc3.Controls.Add(reqFieldValidatorAlt);    r3.Cells.Add(r3bc1);
        r3.Cells.Add(r3bc2);
        r3.Cells.Add(r3bc3);
                   
        table.Rows.Add(r3b);
    }


    So where did I get this code? Well, I knew there was a similar function for the title field on the next step of the wizard, so I did some searches in the source code for that and found these lines of code. Then I just modified some of them to fit the alternate textbox instead.

    Here’s how it looks like in Visual Studio:


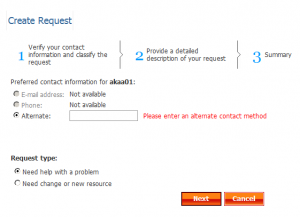
    When an end-user tries to go on to the next step without entering an alternate contact method, they will get a warning like this:

    So now when we’ve done that we should be finished for now. Build your solution and copy the DLL files to the SSP server and try it out. (See part 2 of the series for more details on how to do this)

Any comments regarding this post is highly appriciated! 🙂

Note: The function of validating that something has been entered into the Alternate text box will only work if the user doesn’t have any E-mail address or Phone available. What we really want, is that as soon as someone checks the radio button for alternate (or clicks in the textbox), we want to enable this validation. I’ll try to figure out how to solve this post an update if I do. Tips on how to trigger a postback is appriciated!